SwissSkills mission future Team – Your Induction (new)
Following this guide step by step is the most efficient way to familiarise yourself with SwissSkills mission future Team. All links (bold text, underscored) will take you to corresponding webpages and documents. The list at the end of this induction manual provides you with all links, documents, and contents of the various PowerPoint presentations.
We recommend the following approach: Read the manual section by section, then click on the tab for the portal for teachers, and apply what you learned after each section. Return to the manual and continue with the next section.
1. Getting started
- Click on Class projects on your menu, and go to Create project. In general, you will need one project per class. There may be exceptions: You may want to create a test project while working through this guide, for instance.
- Go to Choose a type of project and click on Basic project button [01]. Your project will be configured based on the information you provide in the steps below.
- Click on + to increase the number of participants (to 5, for instance).
- Enter a name for your project, e.g. test XYZ (or use a creative name or pseudonym for your class).
- Click on Class projects and then Manage projects.
- When clicking on Manage projects, a list of all projects you have created will appear. All columns (except for the first one) have the «i» icon in the first line. Please click on the individual icons and read the information carefully.
2. Complete the visual questionnaire, the Visual Implicit Profiler (VIP)®
- Select the List button in the list of access codes for your project. Save the list so that you can download and open it.
- Enter your name in the Name column.
- Copy (or write) the corresponding access code.
- Click on the link that will take you to the Visual Implicit Profiler (VIP) and follow the instructions on how to complete the questionnaire (you will need the access code to do this). The pseudonym you chose will appear on the webpage of your project / the webpage of your class. This is how we guarantee the anonymity of your students. Please use a computer or tablet (not a mobile phone)!
- Once the questionnaires are completed, please download the worksheets, save them on your computer and click on Show profile, so that you can download the profile as well.
3. Review the results generated by the VIP, your personal strength profile
- As a participant, you have received an e-mail with links to your personal strength profile and to the two worksheets My soft skills and SwissSkills champions. Your students will receive the same documents once they fill out the VIP. More details on these worksheets will follow.
- As a teacher, you have received another e-mail providing you with the link to the personal strength profile, the same you received in your role as a participant. You will receive such an e-mail, every time one of your students completes his or her VIP questionnaire. Please note, that only teachers have access to the profiles via the list of access codes and receive an e-mail notification with regard to profiles.
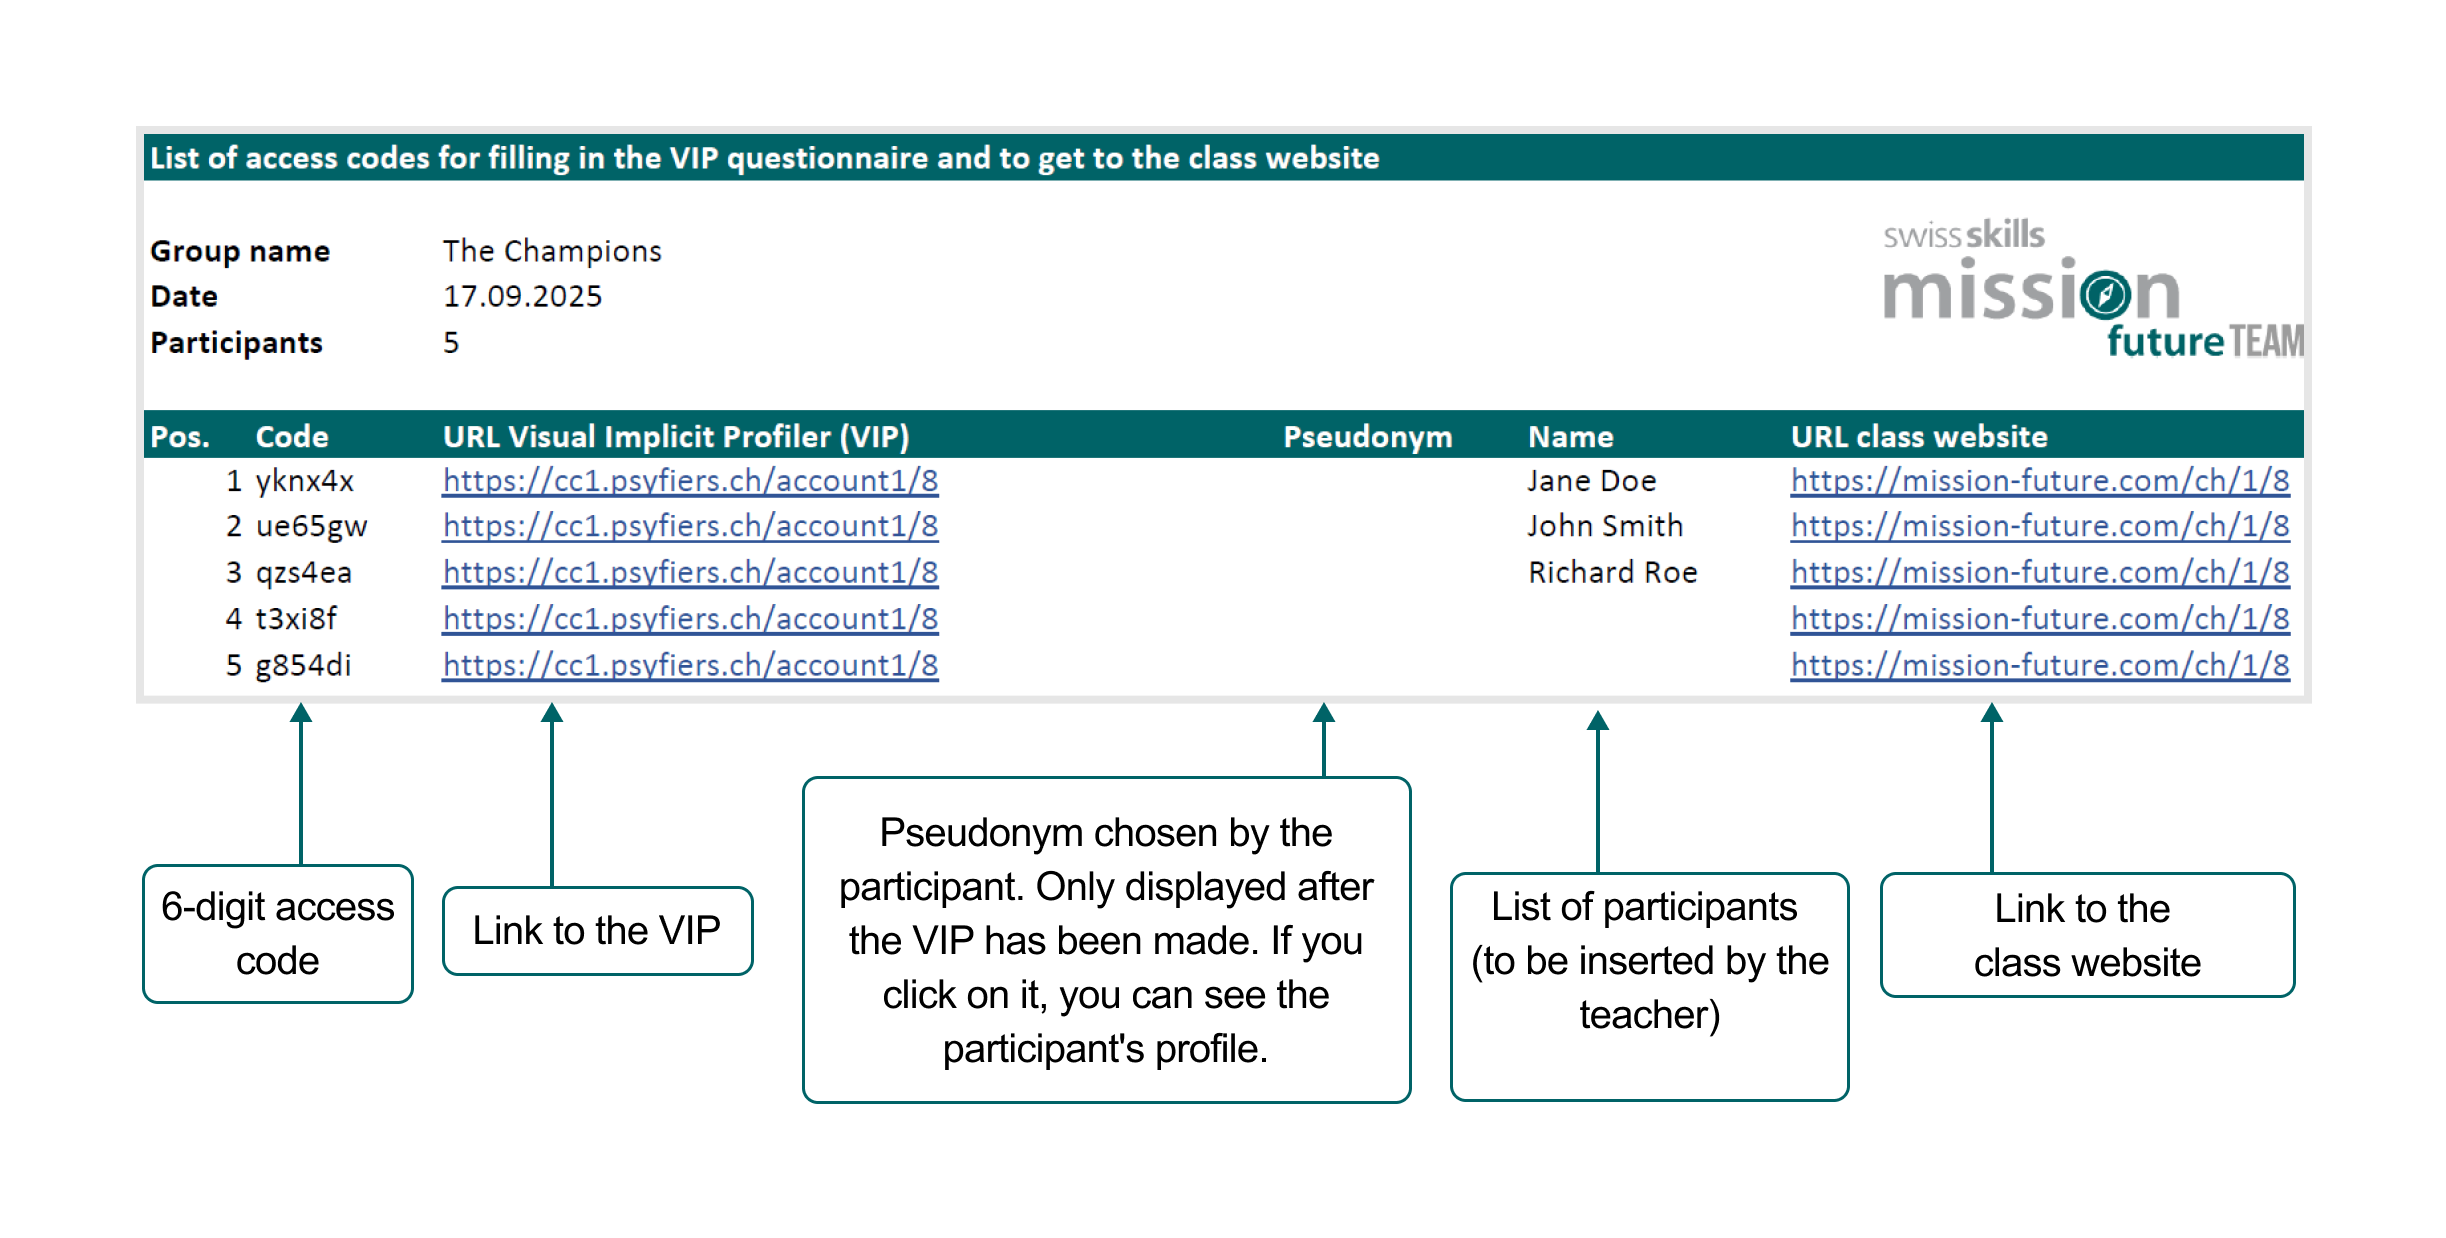
- Each new profile will automatically be added to the list of access codes. Reload the list in order to get access to the profile. As soon as an access code has been used, the pseudonym of the corresponding student will appear on the list. You can open and save the complete profile by clicking on the pseudonym. Please note: The list only updates pseudonyms. To ensure privacy integrity, the names of students will appear only in their own PDF or Excel list, if they provide their name beforehand.
- To distribute the links and access codes, we suggest that you insert the list of students on the Excel list and distribute the list to your class. If you are concerned about data privacy and confidentiality, please provide the respective lines of the Excel list individually to one student at a time. The allocation of codes remains within the class. Only the pseudonyms chosen by the students will appear externally, on the webpage. Only you and the respective students will know, which pseudonyms are used by which student.
- Before looking at your profile, please watch the VIP tutorial video. The video will explain the basics of the VIP, as well as its potential and limitations.
- Click on the next link to view Jane Doe’s teacher profile.
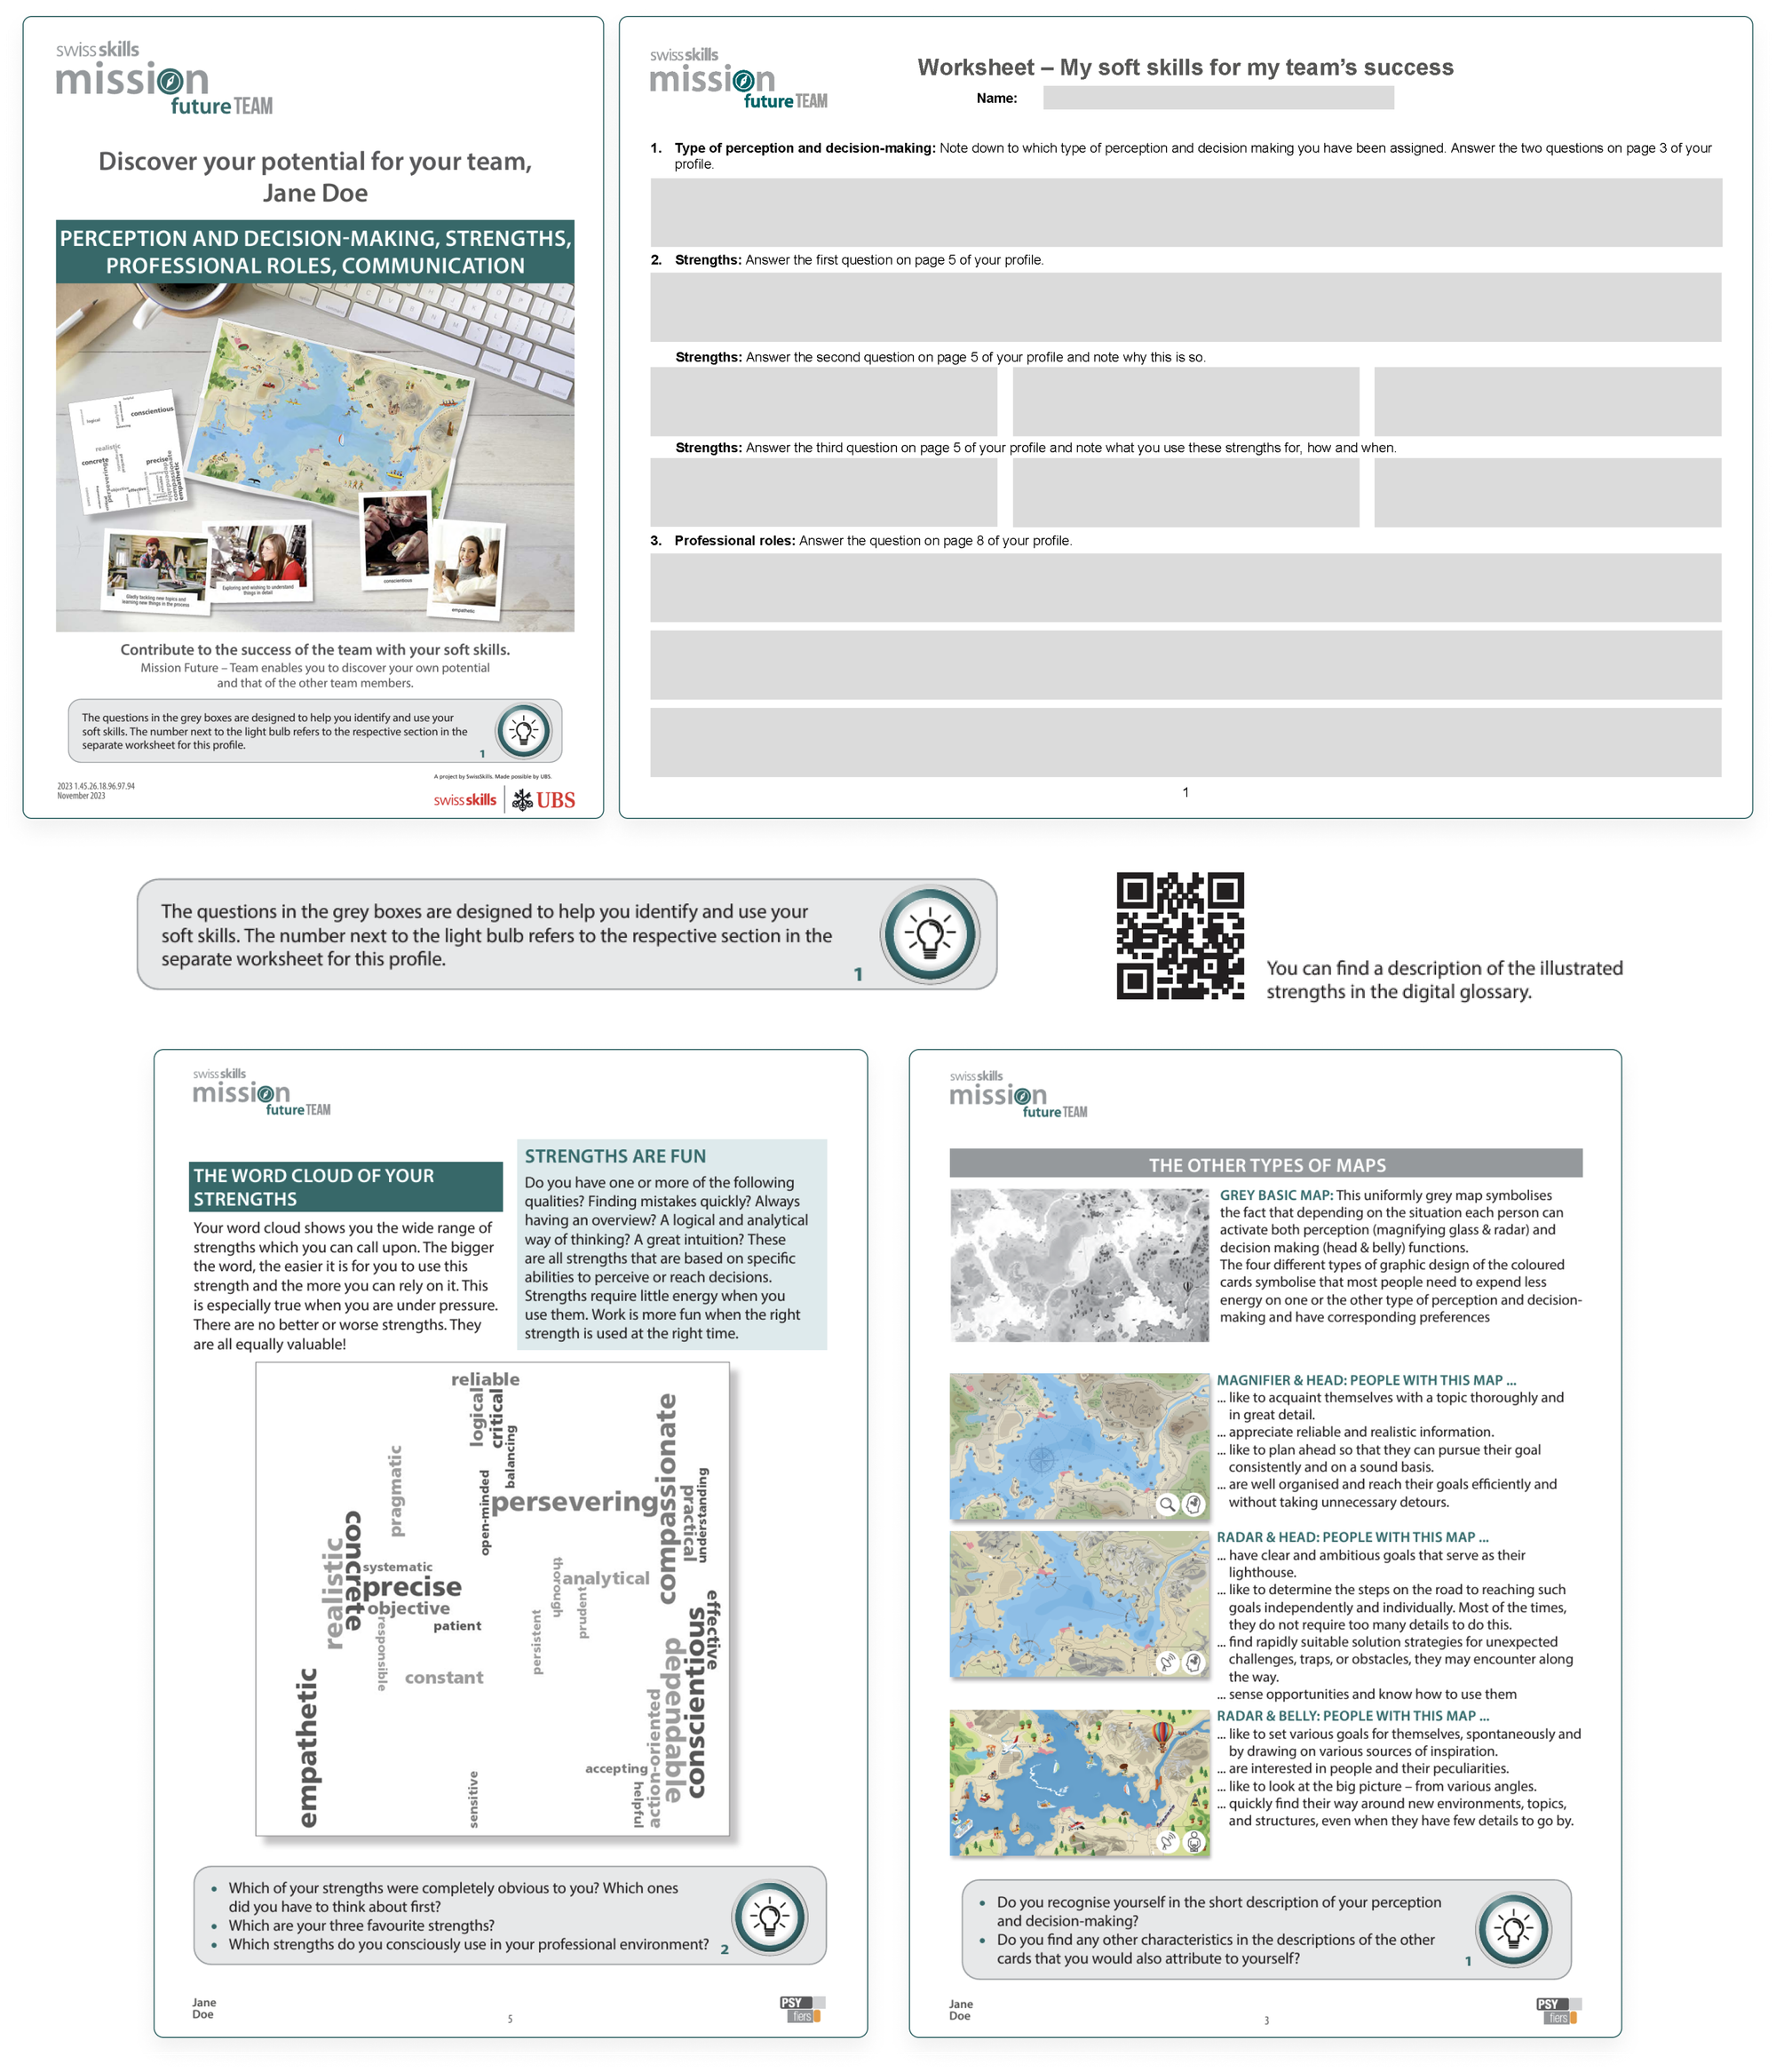
- Take the time to read your own profile carefully (it serves as a test and is therefore identical to any student’s profile you have downloaded as a teacher of this class project or have received in an e-mail). Learn more about your profile by answering the questions in the grey box marked with a light bulb and refer to the My soft skills worksheet. For more information, go to section 7 of these instructions. And even more details are available in the strength glossary you can access by using the QR code on page 4 of the profile. Jeanne Dupont’s profile contains a grey box (marked with an i icon) that will tell you more about the elements of the profile.
4. Creating your personal web profile and meeting the SwissSkills champions
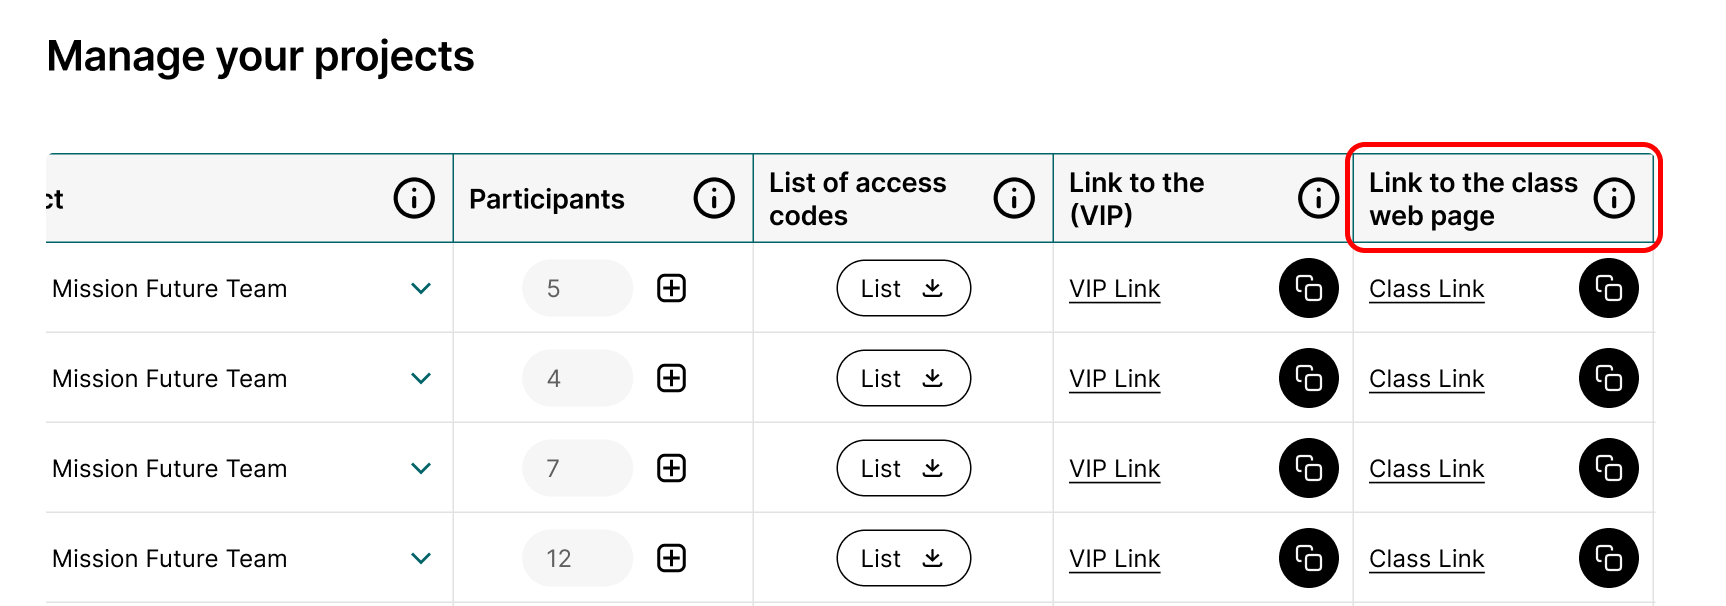
- Go to Manage profiles and click on the link to get to the class website (or find the link in the list of access codes).
- In order for you to view the design of your students’ project, click on Student Login on the upper right of your screen. Enter your access code (which is the same you used for the VIP) and follow the instructions. Create a pseudonym and select one of the icons on the class website. Choose three preferred strengths and professional roles from your personal profile (which includes 12 strengths and eight professional roles overall. Confirming your choice will generate your own web profile. In this profile, you will meet SwissSkills champions with whom you share certain strengths and professional roles.
- Open the worksheet on SwissSkills champions und work through it. Follow the instructions on the sheet and meet at least one champion. Watch one of the videos and add it to the class website. Note: Go to section 6 to learn more about working with this function.
5. Working through the «Introduction to the project» PowerPoint presentation
We have prepared two presentations for you, one to assist you when introducing the project to your class and another to assist you when explaining the mission future strengths and soft skills approach. The presentations are both self-explanatory, and we provide them in an open PowerPoint format, so that you can adapt them to your specific needs. Additional explanations are available as speaker’s notes below each slide.
To make things even easier, we have also compiled all speaker’s notes in a Word document (available in the download area).
PowerPoint: «Introduction to the Project»
- The Introduction to the Project presentation will assist you when introducing the project to your class. It includes slides explaining the background, goals, and the procedures of SwissSkills mission future Team. You can use and adapt them at your leisure. Please go through the presentation and then return to this document.
6. Exploring the class webpage
The icons and pseudonyms for all students appear on the class webpage so that every member of the class can call up their individual web profiles.
The class webpage includes the following additional elements:
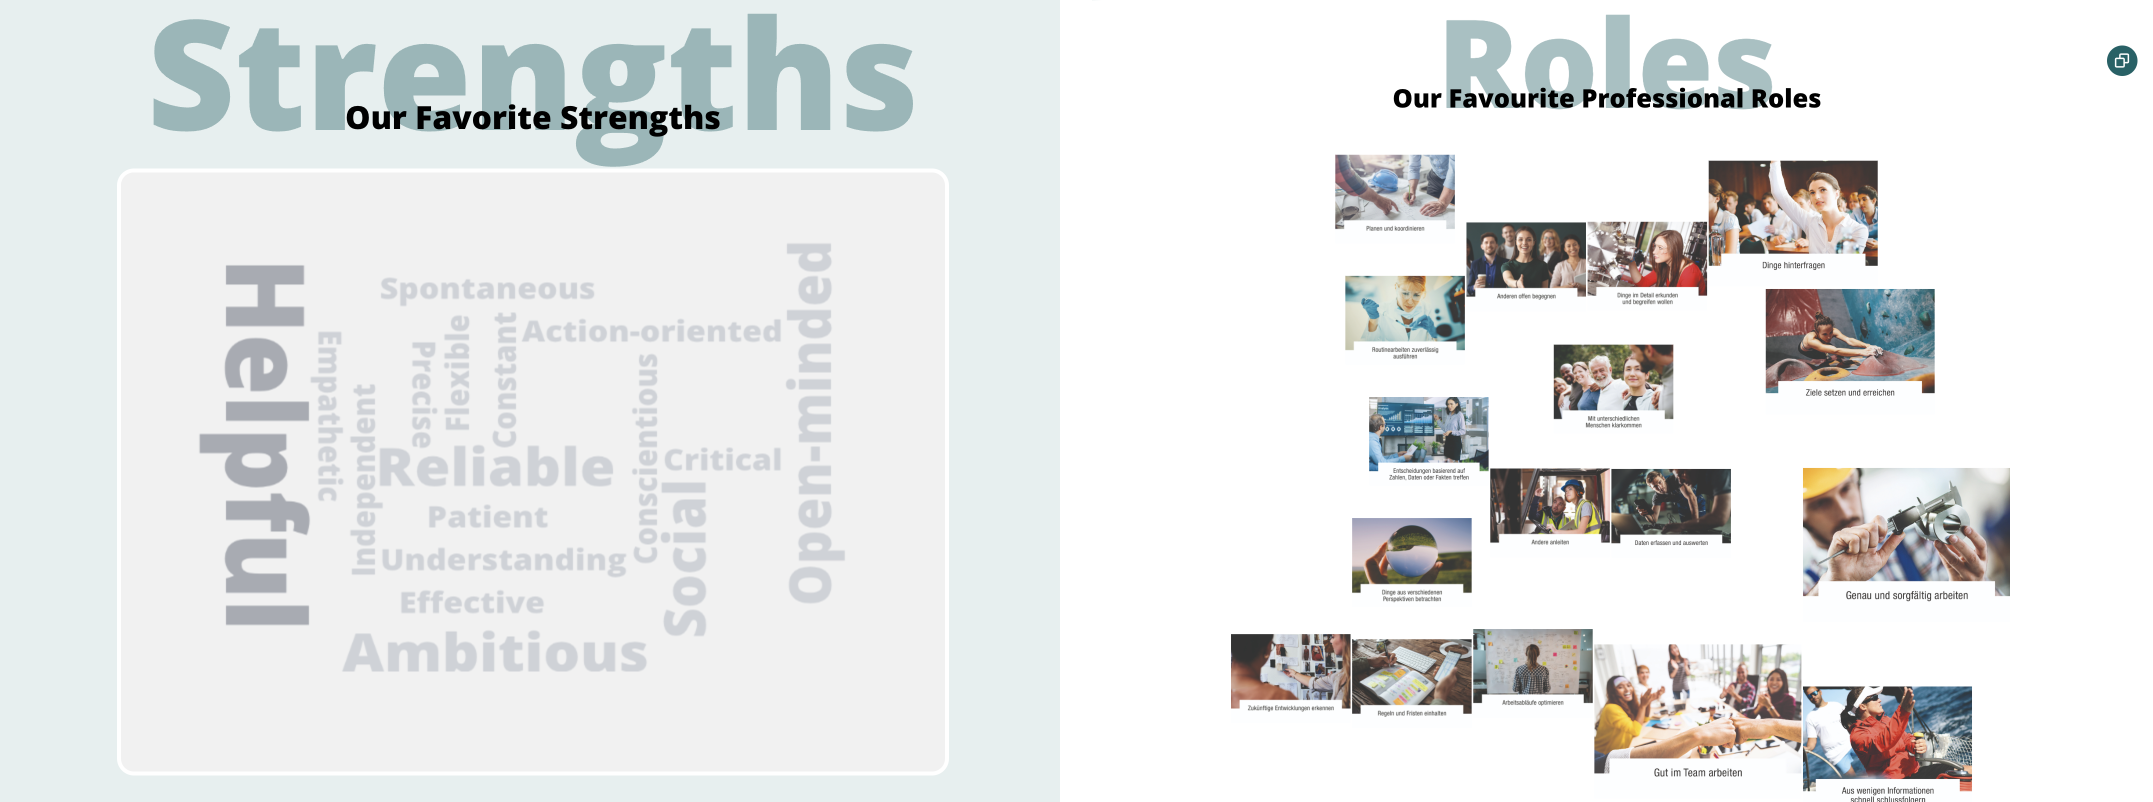
- The word cloud showing preferred strengths and the collage of illustrations showing preferred professional roles help highlight similarities and differences in your class. And they provide a great overview of a group’s common preferences with respect to perception and decision-making. NOTE: Learn more on when to use these elements in section 7.
- The Inspiration section allows students to recommend a video of a champion, who happened to inspire or impress them.
- In the Inspiration section, you have the opportunity to create three word clouds that might serve as a guiding thread for your mission future Team debriefing after group works are completed. Please refer to section 8 for further information on this debriefing.
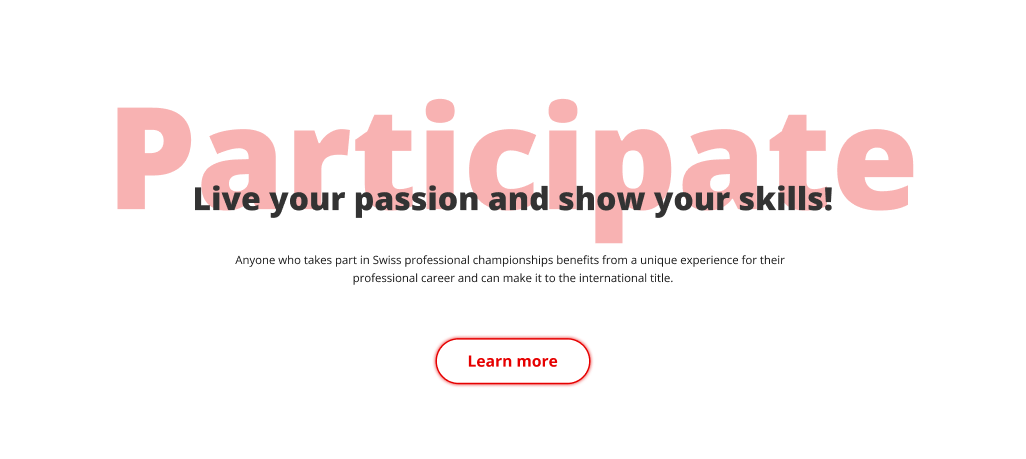
- Go to Participate in the final section of the class webpage to find a number of links providing more information on SwissSkills and help you sign up for a competition.
7. Going through the «The success of «we» is a decision!» presentation
This presentation explains the foundations of SwissSkills mission future Team, and it addresses the preferred strengths and professional roles in your class. In addition, it shows the importance of strengths and how they are applied for successful teamwork using the SwissSkills national team as a reference and introducing its members as role models. The final slides illustrate how to continue the project on the interactive development platform.
PowerPoint: The success of «we» is a decision!
1. Work through the «The success of «we» is a decision!» PowerPoint presentation and then return to this document. Again, there is a document listing all speaker’s notes on the presentation in the download area.
8. The interactive team development platform
The dynamic, interactive team development platform helps students develop a better understanding of their soft skills in the context of a project or group work. Any form of group work in which students can utilise soft skills for the success of the team is suitable. The platform is used preferably when actually meeting in class, i.e. face-to-face. However, it is also available for remote use, i.e. online. Accordingly, there are two options.
Option 1: The first video in the presentation «The success of «we» is a decision!» (see also section 7) shows how the workshop is conducted face-to-face. The group needs a mobile phone and internet access for this option. We recommend that moderators of larger groups use a tablet or computer, possibly even connected to a larger screen.
Option 2: The second video in this presentation shows how the workshop can be conducted online. The members of such groups will need a tablet or a computer and internet access.
The contents of the workshop: The video shows the contents of the workshop. It describes the group task and includes the final segment of the workshop video in which Lynn, the avatar, explains how participants can establish their team profile. This profile will serve as a basis for the debriefing.

Students are given the following tasks:
Once have created their team profile, they can download it and are asked to take it into account during their group work.
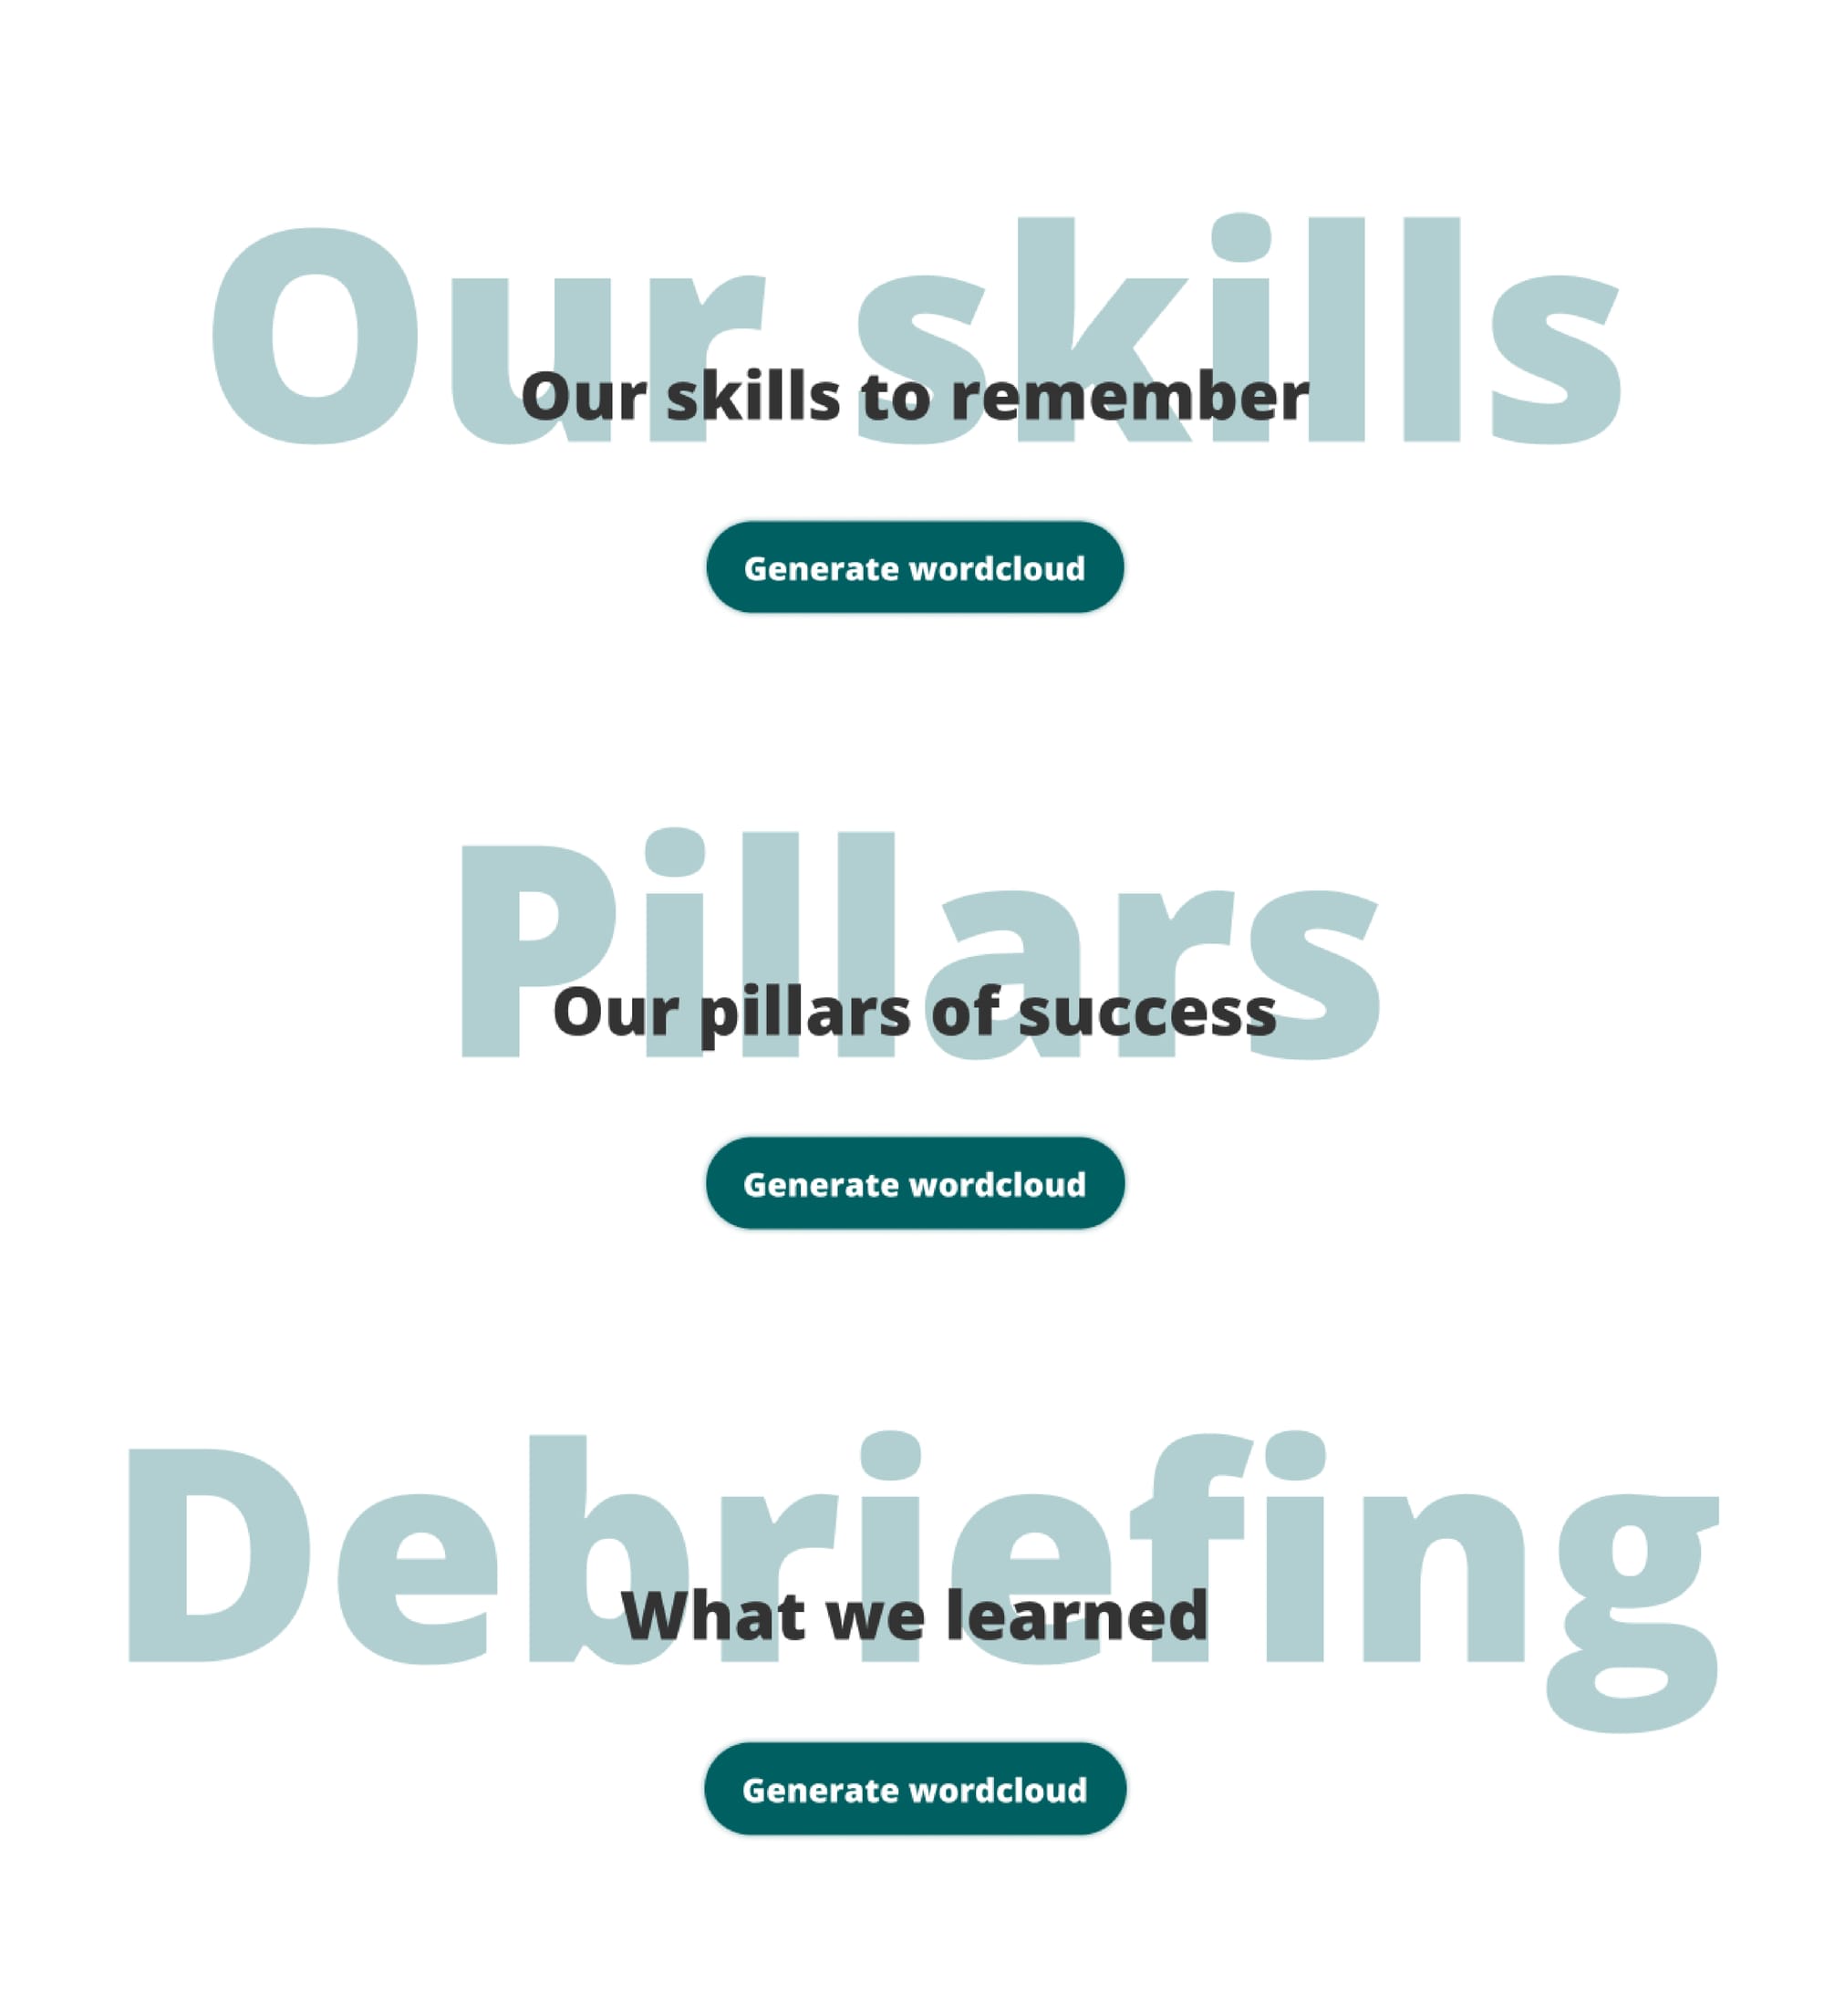
The debriefing concludes the group work: You can design your own debriefing. To facilitate preparations, we prepared a three-step debriefing (see also section 6 and the final slide of the «The success of «we» is a decision!» presentation below).
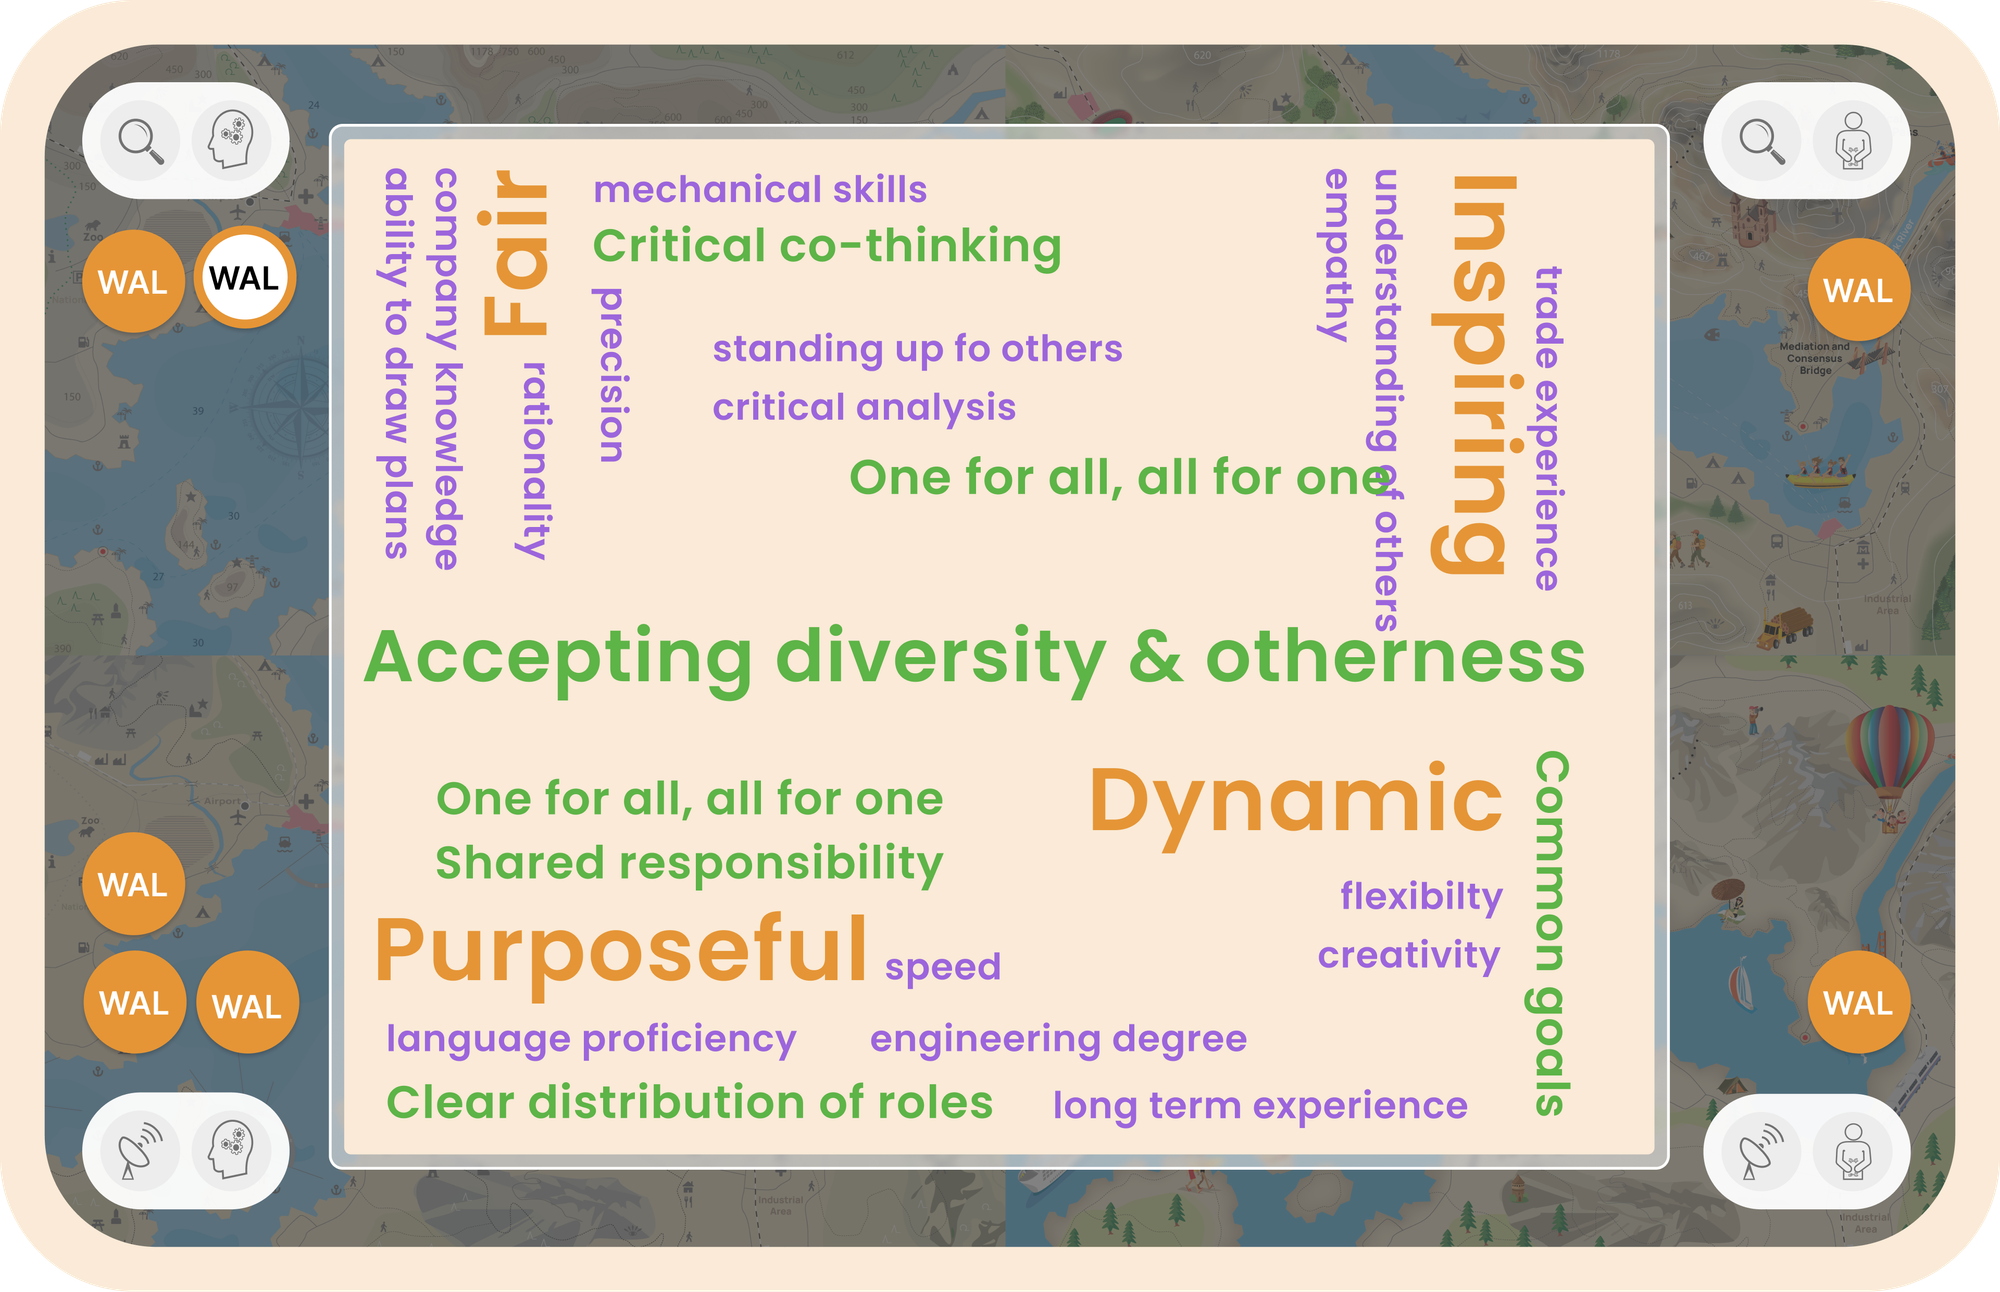
The class webpage offers the opportunity to create three word clouds in class. When showing the image on your computer or tablet screen, students can watch live as the word clouds evolve and thus experience a process they will remember and take home with them. Ask your students to provide three word clouds in their feedback and explain them briefly. Form work groups.
The three word clouds allow you to cover the following themes:
- Students select skills: Ask your students, which skills they had decided to contribute to the team and whether they managed to do this. List only skills that have proven useful in the word cloud. Use the same font size for all skills you write down.
- Students find formulas for success: Ask your students, which success formulas they determined and how they were able to apply them during their group work. Add only elements to your word cloud that have proven useful. Every time you click on a formula in the dropdown menu, it will be inserted, or the term in the word cloud will be enlarged. This is a great moment to discuss, which behavioural principles might be most successful.
- Teamwork and cooperating – What your students take away from their group work on soft skills: As a debriefing moderator, your role is to find concise terms and summarise longer explanations. Limit the reports to 35 characters. Write all statements down in the same font size.
9. Adjusting your SwissSkills mission future Team to the specific needs of your class
Implement SwissSkills mission future Team according to your class’s needs.
- Split tasks to be done in class and at home as you wish
- Adapt the presentations and tasks (e.g. the number and mix of SwissSkills champions, or the debriefing procedures).
- Amend, skip, or add slides as you think best.
- Adapt the self-recognition process to the level of your class and the time available. Ask your class to focus primarily on the visual language used for strengths and professional roles, for instance (see also the bonus feature allowing you to download VIP profiles in section 10).
- Use and reuse the interactive team development platform as often as you wish. The more often students determine soft skills they can apply for specific task and the more frequently they have to agree on how to tackle a task as a group, the more effective the SwissSkills mission future Team will be.
10. Next steps: Booking and managing Mission Team workshops
Please return to the main menu of the teacher’s portal an click on Create and manage mission team workshops in the Instructions area.